Don’t you wish the warmer weather could last just a tiny bit longer? Here in the Catskills our warm season is so short, but it’s so beautiful we just have to savor it and be grateful while we have it. Of course, our harvest is generally over with by October or November, but why not attempt to squeeze out a little more with a little cold frame gardening?
The Cold Frame Gardening Journey
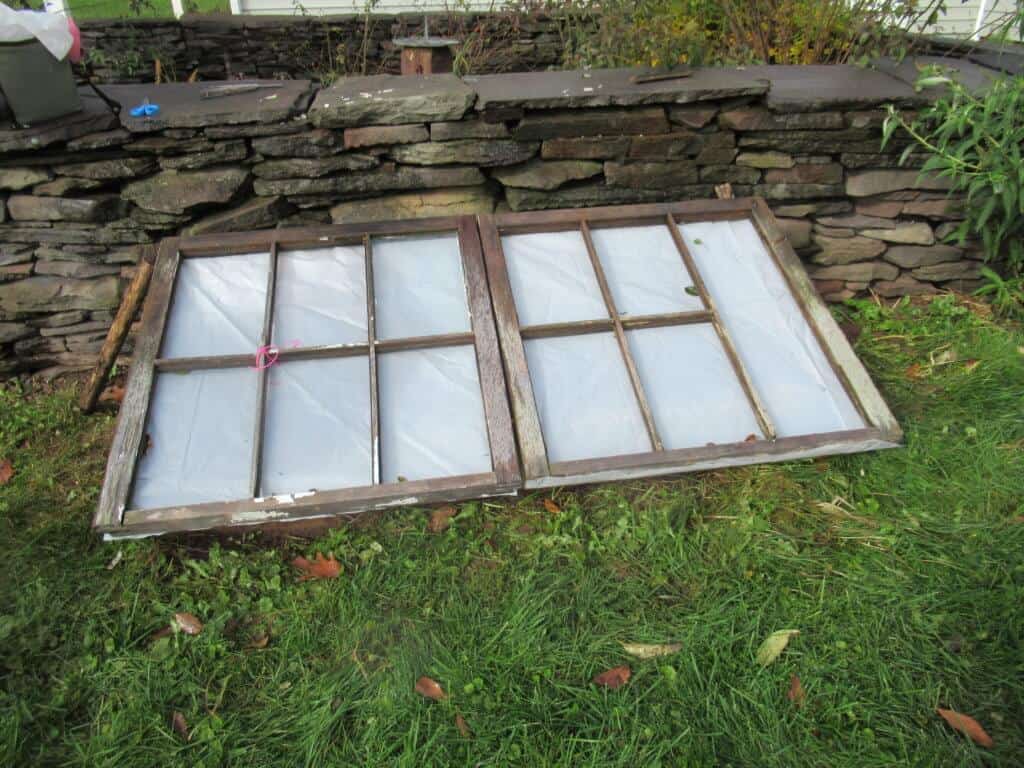
Joel built our cold frame awhile back with some salvaged barn wood and a couple of old windows. Considering that we are not known for any sort of building expertise, it turned out quite well. A few simple measurements and the use of basic tools, like a hammer and saw, and viola!
I think the only thing we purchased were the hinges for lifting up the windows.
To date, we’ve gotten a lot of use out of it, but we usually plant in late winter/early spring. This time we’re going to give the fall/winter time slot a whirl!
Getting Rid of Debris
First, we needed to clean out all the dead plant matter and weeds.

Halfway through the Clean-Up
I’d planted a few onions at the end of the summer which are emerging quite nicely now. You can see them on the left side.

Fixes
Next, it needed repairing. Our snows are so heavy they literally pushed the glass panes out of the window frames. If you look closely at the photo above, you’ll see that all but one of the window panes survived the last winter! (We didn’t bother with it this summer since we leave it open and use it as a regular garden bed.)
We decided to take some plastic sheeting to make a repair. We happened to have some leftover from previous garden projects.

The only materials needed were the plastic sheeting, scissors, and a staple gun.

Since there were two windows, we covered each one separately. This made it easier to open and close the frame.

This job didn’t take all that long. That’s a good thing since it was so cold that day!

Planting, a.k.a. “The FUN Part!”
A couple of days later, we put in the seeds. Since there are already some onions growing in there, I only chose radishes, a lettuce mix, and some Tom Thumb peas.

Radish seeds
Radishes
If you are a beginning gardener, or are unsure of what to plant, I recommend radishes. This is because you can plant a lot of seeds rather close together, and you will get a yield very quickly. They usually take about 3 weeks from seed to harvest. Radishes are very satisfying to grow for these reasons. Not too many critters like them, either, which means you’re more likely to get some! Although I am in the Northeast in Zone 5, so you may have a different experience in your area.

Lettuce seeds
Lettuce
Lettuce seeds are a great second choice because it is really nice to have fresh salad in the colder months. These seeds were a mix, with some ready-to-harvest by 21 days, and others by 55 days.
I don’t know about you, but I never seem to get tired of lettuce. Salads are a mainstay here at the Mountain Farmhouse, and, very often, they are our main course. Lettuce is easily dressed up or down, for all occasions. (wink)
We’ll be eating leafy greens from the garden into the holiday season! (As long as the bunnies don’t realize they’re there!)
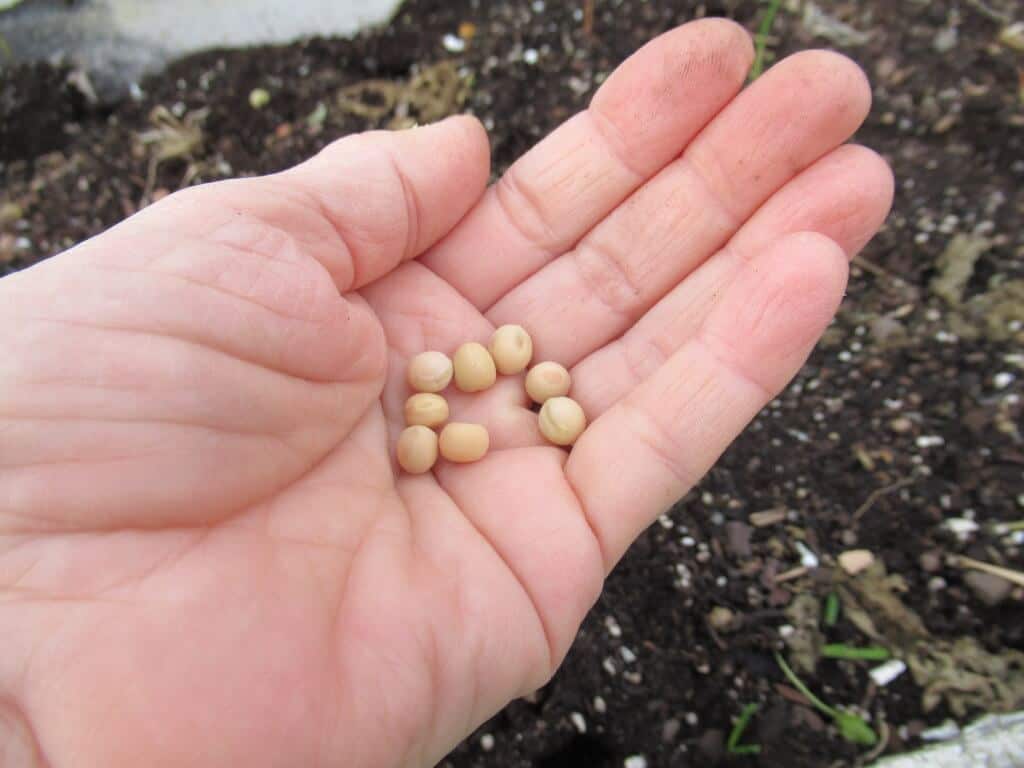
Tom Thumb Pea Seeds
Peas
Tom Thumb Peas were the final choice. This was mainly because we wanted some legumes, but didn’t want plants that were going to clamber all over the place. These little gems only grow up to about 18″ tall! I put them in the back to allow them more height.
At last, the seeds have been planted. That piece of wood on the left side in the photo, below, is one of two. We use them to prop the windows up a little bit in the front if it is heating up too much on the inside of the frame. This allows air to circulate, without leaving what’s inside the cold frame completely unprotected.

We mulched very lightly with some wood shavings we found in our little potting shed-type barn. After that we watered.

Light mulch layer
Then we closed it up for a bit. I have to check it once or twice a day. This way, if it heats up too much, we can open it a bit. We can also check to see if it needs water.
Cold frame closed
Since we’ve never done this before, it will be interesting to see how things grow! (Or don’t grow)
So there you have it! What are the ways you keep edibles growing in the colder months?
Blessings to you and yours! Stay warm this winter!
♥


Leave A Comment